Posts

A Look at Cloudplatform/Apache CloudStack LDAP Authentication Options

Image
LDAP, as the name suggests is a light weight protocol for accessing directory services. You can use any external LDAP server such as Microsoft Active Directory or ApacheDS or openLDAP to authenticate CloudPlatform users. Once configured, to authenticate users, CloudPlatform will query the external LDAP server using the given username/password and the pre configured settings. LDAP users can co-exist with the native CloudPlatform users. Enabling LDAP integration First we need to inform CloudPlatform about the LDAP server and configurations it can use. Its a two step process. LDAP Global Settings Go to global setting and search for ldap. Here is a screenshot of the settings I used in my lab for Microsoft AD. The following global configurations should also be configured: ldap.basedn : Sets the basedn for LDAP. Ex:  OU=APAC,DC=company,DC=com ldap.bind.principal ,  ldap.bind.password : DN and password for a user who can list all the users in the above basedn. Ex:  CN=Adminis
Configuring ADFS SSO with Apache CloudStack/CloudPlatform using SAML

Image
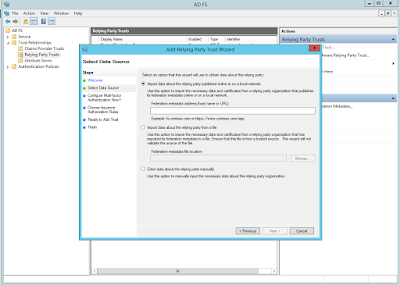
Apache CloudStack supports SAML2 integration. This can be used to enable SSO using ADFS. Prerequisites: 1. ADFS server running with https enabled (lets call this sso.example.com) (This is called Identity Provider or IdP in SAML terminology) 2. Management Server with https enabled (lets call this cloud.example.com/client) (This is called Service Provider or SP in SAML terminology) 3. ADFS and MS should be able to talk to each using domain names and https Installing ADFS on windows server 2k12 R2 Keep a verified certificate PFX file and password handy Go to server manager, Manage -> Add roles and Features, select Domain services and install. Once installed, configure it and promote it to domain server  Go to server manager, Manage -> Add roles and Features, select Federation Services and install Once installed, configure it. During the configuration it asks for certificate provide the required certificates and install Reference:  https://www.virtuallyboring.

Parsing CloudStack Management Server logs and tracing API command

Parsing CloudStack can be difficult sometimes since the API calls create asynchronous jobs. A new user might find it difficult to trace the logs from api to the actual end point(Host, SSVM, KVM agent, Direct agent etc.) Here is an example on how you can parse the logs: 1. Look for api call and find logId:xxxxx from the logs. $ cat vmops.log | grep "createSnapshot" 2018-03-20 17:26:13,968 DEBUG [c.c.a.ApiServlet] (qtp502458215-2586:ctx-625958a0) ( logid:15907246 ) ===START===  10.233.88.86 -- GET  command=createSnapshot&response=json&volumeId=3128662b-b696-42a2-ba28-921ba330b430&quiescevm=false&asyncBackup=false&name=snap9&_=1521547911513 2018-03-20 17:26:14,229 DEBUG [c.c.a.ApiServlet] (qtp502458215-2586:ctx-625958a0 ctx-d4cd9ea2) ( logid:15907246 ) ===END===  10.233.88.86 -- GET  command=createSnapshot&response=json&volumeId=3128662b-b696-42a2-ba28-921ba330b430&quiescevm=false&asyncBackup=false&

Resizing Root disk of a linux Virtual Machine

In CloudStack, the default root disk size comes from the template. For the default CentOs 6.5 template, this was around 1.3GB. I wanted a VM in my CloudStack deployment with root disk size as 20GB.  I created a vm with custom root disk size as 20GB. Even after specifying root disk size, df -h was showing only 1.3GB as usable disk.  [root@VM-8b19c14c-9feb-4b77-a488-502b38e32ed1 ~]# df -h Filesystem                    Size  Used Avail Use% Mounted on /dev/mapper/VolGroup-lv_root  1.3G  604M  649M  49% / tmpfs                         1.9G     0  1.9G   0% /dev/shm /dev/xvda1                    485M   32M  428M   7% /boot fdisk -l showed that there is additional space but volumes were not created. [root@VM-8b19c14c-9feb-4b77-a488-502b38e32ed1 ~]# fdisk -l Disk /dev/xvda: 21.5 GB , 21474836480 bytes 255 heads, 63 sectors/track, 2610 cylinders Units = cylinders of 16065 * 512 = 8225280 bytes Sector size (logical/physical): 512 bytes / 512 bytes I

Installing VmWare PowerCli on MacOS

PowerCli is the command line for the VmWare infrastructure. PowerCli uses Microsoft PowerShell Core and .Net. It might be challenging to get it working on MacOS. Though PowerShell says its cross-platform, I was facing issues with installing and running it on mac. Docker to the rescue. VmWare published PowerCliCore DockerFile . With this, installing PowerCli was very easy. These are the commands I used: (I am running MacOS High Sierra 10.3.3 and I have docker for mac already installed) Install and run $ docker pull vmware/powerclicore $ docker run –rm -it vmware/powerclicore To run in daemon mode $ docker run –name powercli     -dit vmware/powerclicore $ docker exec -it powercli pwsh After this point, you will be on the PowerShell prompt and can run regular PowerCli Commands If vSphere has a self signed certificate, you have to ignore SSL validation for Cli to authenticate successfully PS /root> Set-PowerCLIConfiguration -InvalidCertificateAction Ignore Connec